Intro
We outplanted seed from 2023 that was hardened daily (effort B) and weekly (effort D) in bags at Westcott Bay Shellfish today in order to do a growth and survival experiment. See the timeline of hardening and distribution of animals in Ariana’s notebook post.
Experimental setup
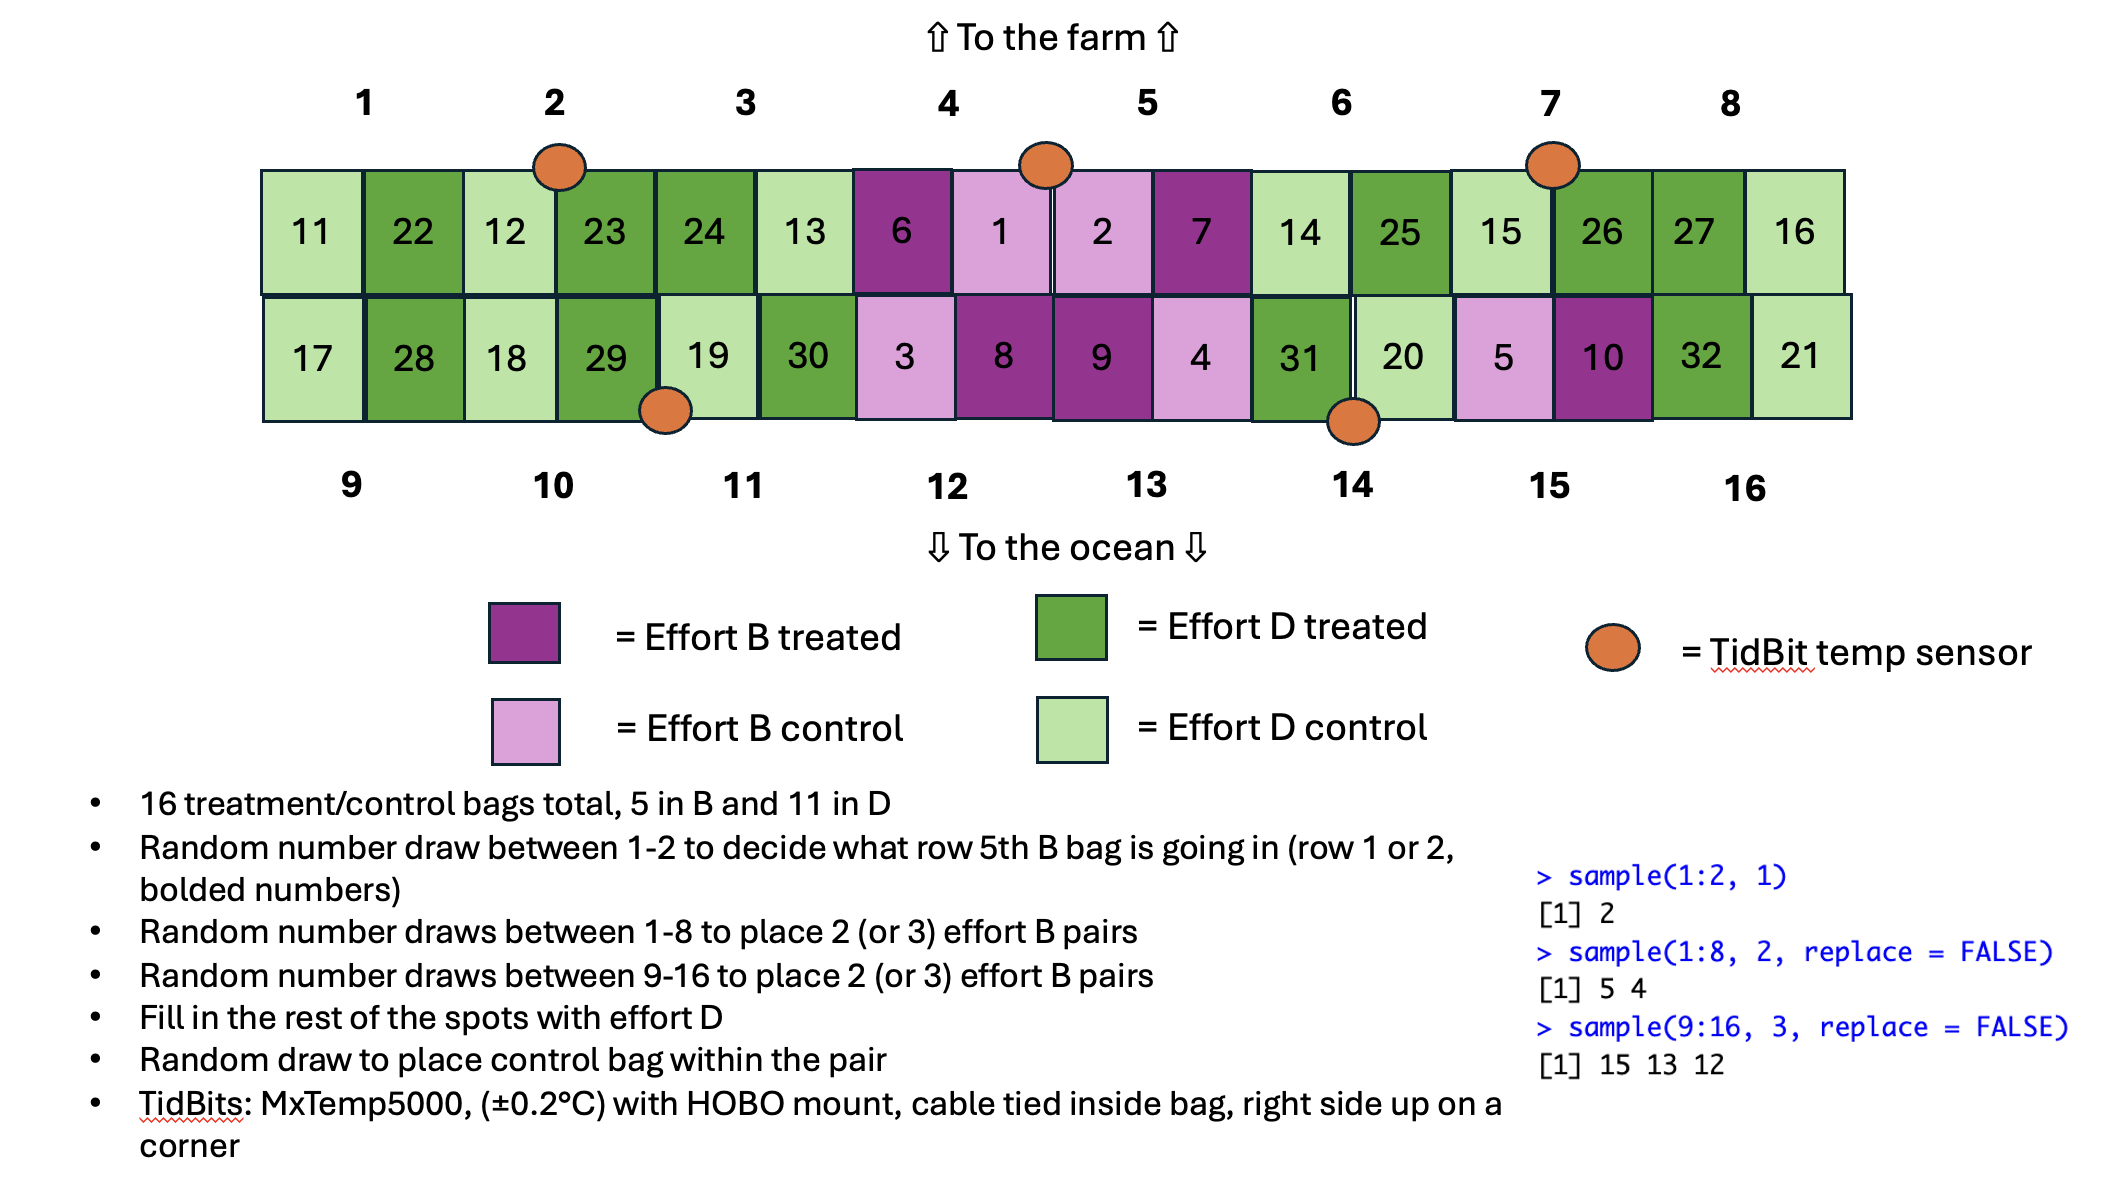
1/4” mesh rack bags were laid out in 2 rows of 4 racks (4 bags each). Bags were between a clam net and another oyster rack pretty far up on shore. Temperature sensors were placed around the rack formation to get an idea of the overall thermal environment. 15 oysters per bag were labelled with wire markers (attached via Z-spar, “Splash Zone 2 part epoxy”) for future growth measurements.
Bag layout
5 treatment/control (T/C) pairs from effort B were laid out with 50 animals a bag. 11 treatment/control pairs from effort D were laid out with 100 animals a bag. Effort B and effort D had different size classes (see link to Ariana’s diagram above). 2-bag spots were assigned a number. The second row was randomly selected to have 3 bags from effort B, while the first row would have 2 bags, that way location could be controlled for across replicates. Effort B T/C pairs were randomly assigned to first row and second row spots. The rest of the spots were filled in by effort D pairs.
Future efforts
I will be measuring growth (height, width, length) in 15 oysters per bag every month throughout the summer. I will be measuring survival in bags every week, looking at # of live animals per bag.
Relevant documents
Scanned drawing of bag layout here
Order of bag placement and oyster labelling, with range of wire marker numbers here
Scanned log of wire marker labels here