Procedure
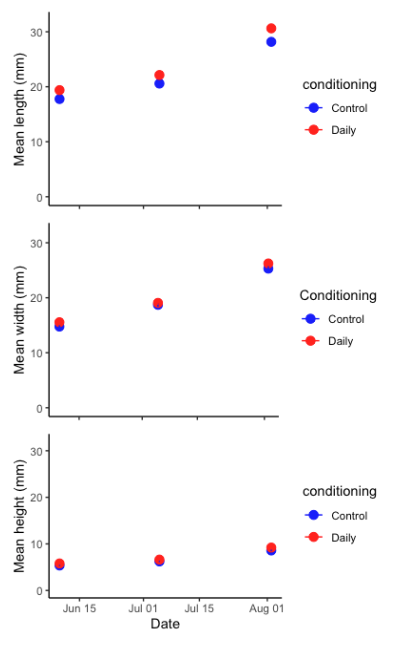
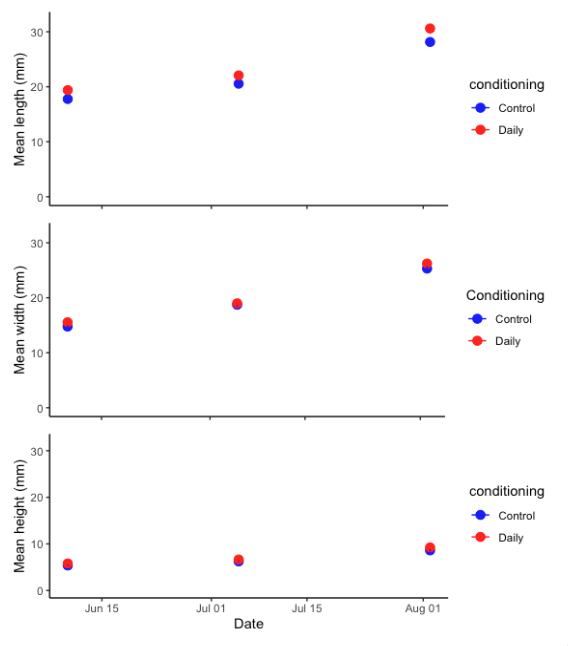
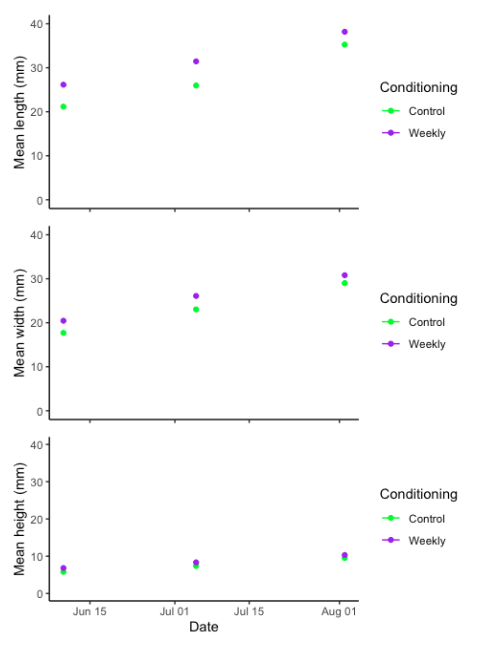
We’re losing tags here and there, but not too many, so when we lose tags we supplement them with untagged random oysters from the bag to get 15 per bag. They are labeled in the datasheet, so I’ve included the following graphs of data with the random oysters added on when needed, and then graphs with the random ones removed.
With random oysters
Effort B
Effort D

Without random oysters
Effort B
Effort D
Summary
Not that much of a difference in growth between any of the treatments, when looking at either the supplemented data or the unsupplemented. Width and height continue to not offer that much additional information, at least when looking at averages.
I am keeping our measurements at 15 a bag because I know it will be helpful for a growth model at the end if we keep the design as balanced as possible. Alternatively, if that’s not a concern, we can exclude them and just track the tagged individuals over time.